Tom Bombadil is Tolkien’s most famously unaffected character brought to Magic as a build-around: a five-color 4/4 that goes hexproof and indestructible once your Sagas have racked up enough lore counters, and rewards you for chaining Saga after Saga once that engine is running. He’s also one of the more demanding new Hobbit commanders — five colors and a real Saga count are both genuine deckbuilding asks, not flavor text. Here’s how the deck actually wants to be built, which Sagas are worth prioritizing, and what the payoff looks like once it’s online.
The Commander
Untouchable once you’ve committed to Sagas, and a free Saga tutor every turn once he’s online. Tom Bombadil wants a five-color Sagas-matter shell built entirely around him.
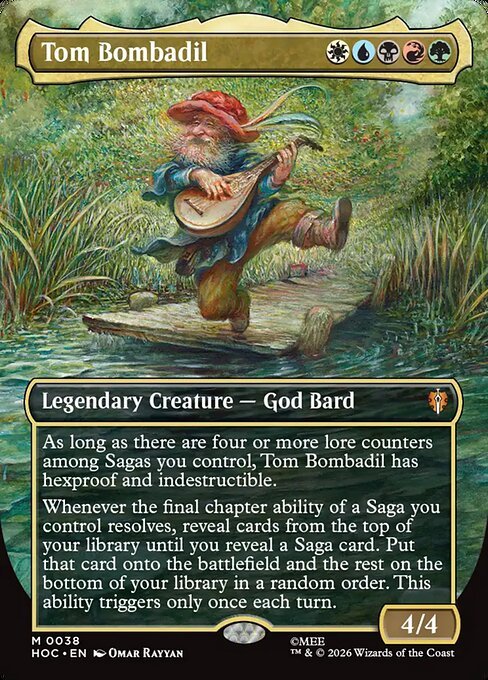
Tom Bombadil costs {W}{U}{B}{R}{G} and is a 4/4 God Bard. Once you control four or more total lore counters across your Sagas, he becomes hexproof and indestructible — genuinely unkillable in a deck that’s doing its job, and a serious problem for opponents relying on targeted removal or combat math to deal with him. Whenever a Saga’s final chapter resolves, you reveal cards off the top of your library until you hit another Saga, put it directly onto the battlefield, and bin the rest — a free Saga every turn, once per turn, for the rest of the game, which means the engine compounds rather than running out of gas.
The five-color cost is the real gatekeeper here. This isn’t a deck you splash Tom Bombadil into — it’s a deck built specifically to support him, which means a mana base that can reliably produce all five colors on curve, and a critical mass of Sagas pulled from across Magic’s color pie rather than concentrated in one or two colors.
Why Saga Density Is Everything
The entire deck lives or dies on one number: how many lore counters you can have on the battlefield at once. Four is the threshold for Tom’s hexproof and indestructible to turn on, and since most Sagas add one lore counter per turn and sacrifice themselves after their third chapter, you generally need at least two Sagas running simultaneously — ideally more — to hit and hold that threshold consistently. That’s why cheap, low-chapter-count Sagas that come down early matter more here than flashy six-mana ones that take too long to contribute.
This is also why Tom’s own ability matters so much structurally: once you’ve found your first two or three Sagas naturally, his triggered ability starts finding the next one automatically, and the deck effectively snowballs from “I need to draw Sagas” into “I don’t need to draw Sagas anymore.” Getting the engine started is the hard part; keeping it running takes care of itself.
Key Support Cards
Five of the highest-impact Sagas in Magic, all legal and all real EDHREC staples for Saga-matters shells — including one built entirely around this set’s own dragon.
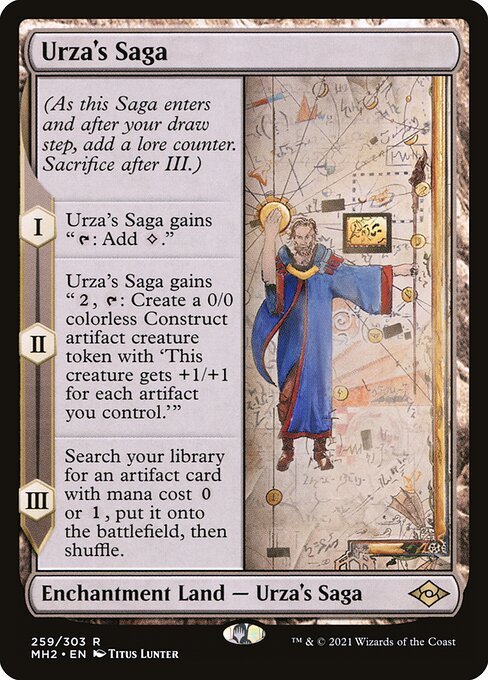
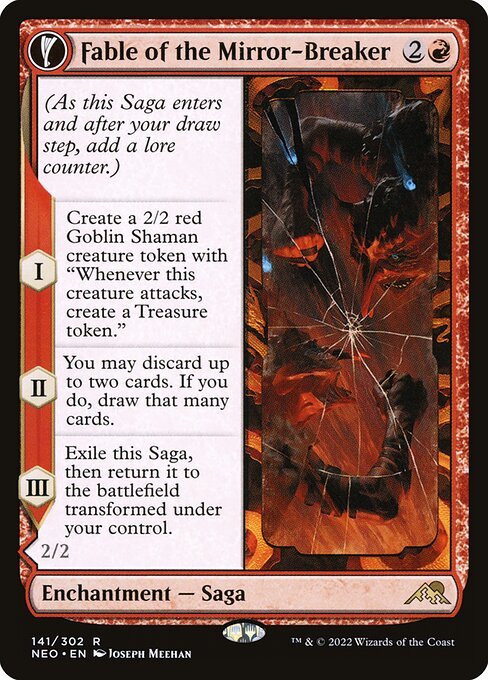
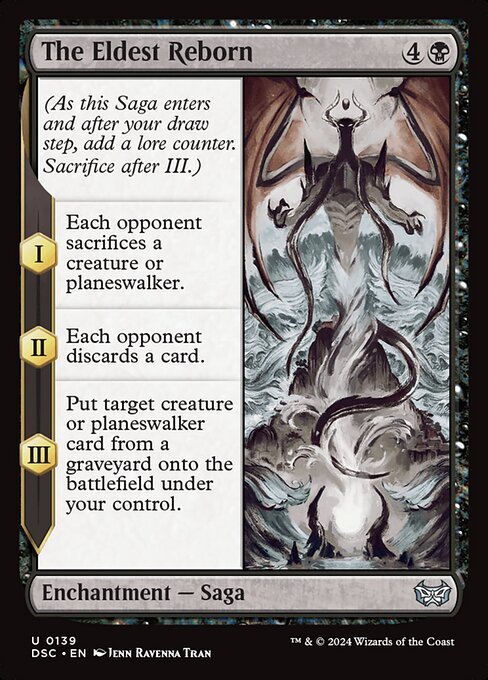
Urza’s Saga is a land that ramps into a Construct token and then tutors a cheap artifact off its own chapter III — one of the most efficient Sagas ever printed, and it counts toward Tom’s lore-counter threshold without even taking up a nonland card slot. Fable of the Mirror-Breaker loots on chapter I and flips into a copy-anything Kiki-Jiki on chapter III, doubling as removal-adjacent value in red decks. The Eldest Reborn is a three-for-one on its own — forced sacrifice, forced discard, then a reanimation effect — that alone is worth running in any deck with access to black.
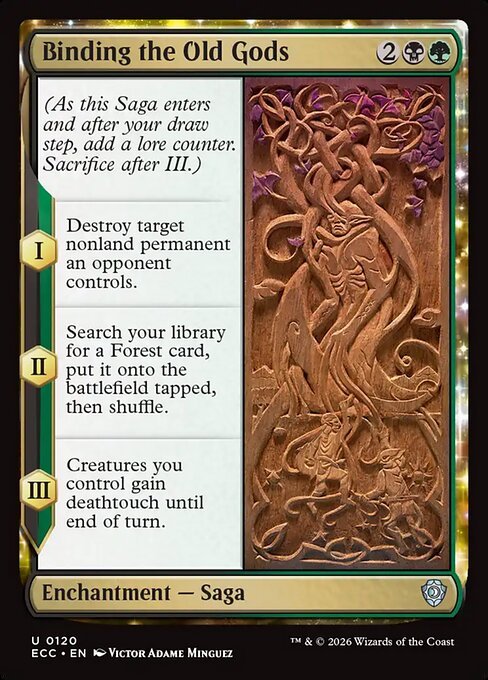
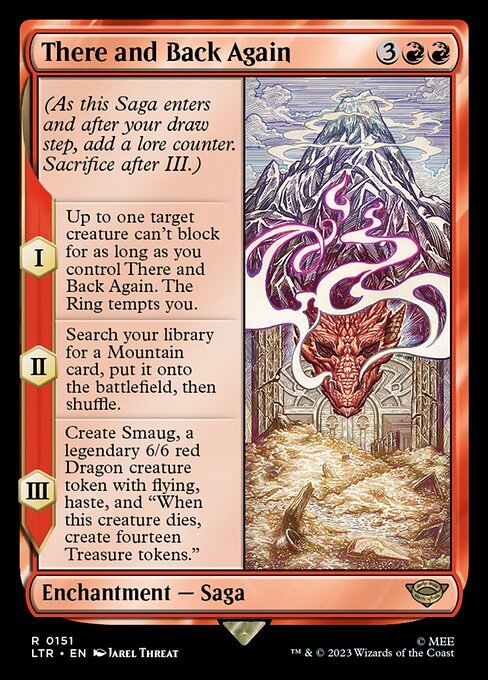
Binding the Old Gods is efficient removal in green-black that also fixes your mana by fetching a Forest, making it one of the cleanest early plays for hitting Tom’s threshold on curve. There and Back Again is the thematic standout — it makes a target unblockable, tempts you with the Ring, ramps a Mountain, and on its final chapter creates a legendary 6/6 flying, hasty Smaug token that drops fourteen Treasures when it dies. It’s a genuinely powerful Saga on its own merits, and it happens to be the most on-theme card you can put in a Hobbit Commander deck.
Keep Reading: Thorin Commander Deck Guide: Dwarf Equipment Tribal (MTG Hobbit) · Sauron, the Dark Lord Commander Deck Guide: Grixis Amass (MTG Hobbit)
Keep Reading: Sauron, the Dark Lord Commander Deck Guide: Grixis Amass (MTG Hobbit) · Thranduil Commander Deck Guide: Elf Graveyard Recursion (MTG Hobbit) · Thorin Commander Deck Guide: Dwarf Equipment Tribal (MTG Hobbit)
Upgrade Priority by Budget
Start by counting how many real Sagas you can fit across five colors — the deck lives or dies on Saga density, since Tom needs four lore counters on the board simultaneously to turn on. Prioritize cheap, low-chapter-count Sagas early so you hit that threshold consistently by turn four or five, then add the bigger value Sagas like The Eldest Reborn and There and Back Again once your curve and mana base are stable. Mana fixing should be your second priority after Saga count — a five-color deck that can’t reliably cast its spells on curve will lose more games to its own manabase than to opponents.
Final Verdict
Tom Bombadil is a genuine build-around rather than a slot-in-anywhere Commander — five colors and a real Saga count are both real asks, and this isn’t a deck you can half-commit to. But for players who already have a Sagas pile from Kaldheim, Dominaria, Wilds of Eldraine, or now The Hobbit itself, he’s a strong reason to finally put them all in one deck, with a commander that becomes nearly impossible to remove once the engine is running and a payoff — an actual Smaug token via There and Back Again — that ties the whole thing back to the set it came from.
Where to Buy
As an Amazon Associate, NerdSnack earns from qualifying purchases.
Frequently Asked Questions
What does Tom Bombadil do as a Commander?
He’s a five-color 4/4 that gains hexproof and indestructible once your Sagas have racked up enough lore counters, rewarding you for chaining Saga after Saga.
Is Tom Bombadil a beginner-friendly Commander deck?
No — five colors and a real Saga count are genuine deckbuilding demands, making him one of the more demanding new Hobbit commanders, not a flavor-only build.
What matters most when building a Tom Bombadil deck?
Saga density — the deck’s whole engine depends on accumulating enough lore counters from Sagas to trigger Bombadil’s hexproof and indestructible payoff.
Add NerdSnack as a preferred source on Google
The Weekly Pull
The biggest card price moves, every Friday.
The cards that jumped or crashed in price this week, plus what’s releasing next. Sign up and get our free Black Friday 2026 price-to-beat cheat sheet. Free. Unsubscribe anytime.
Related Posts:




Talk to us
Got a card, a tip or a request? Email us.
A real person reads every message at hello@nerdsnack.com, and we usually reply within 1–2 business days.
Prefer a form? Use our contact page.
TCGPlayer has the best prices on Magic, Pokemon, Dragon Ball, and Riftbound singles — with seller ratings and buyer protection.